
DMARC (Domain-based Message Authentication, Reporting, and Conformance) is a method of ensuring the authenticity of an email sent from a specific domain.
Regrettably, this critical email security feature is not enabled by default for every domain, web host, or email server. Organizations and email administrators must establish and set up policies for DMARC.
We’ll go over how to set up a simple DMARC configuration on your own domain in this blog. The process includes 3 simple steps to optimally configure your email server to send signed emails.
Step 1. Generate a DMARC record
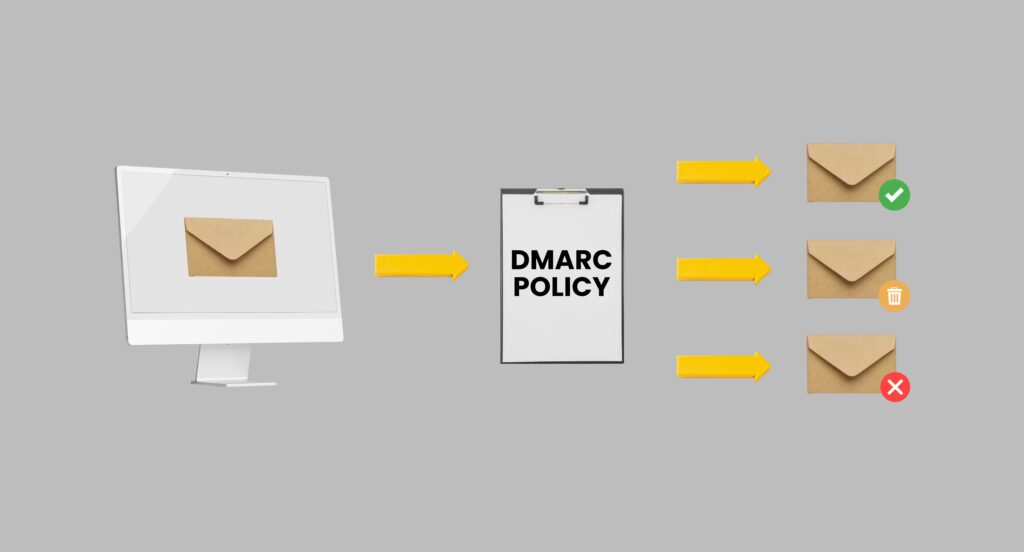
A DMARC record is a short snippet of code that is published to the DNS to tell the mailbox service provider how to handle an incoming email that fails authentication, based on the results of the SPF and DKIM checks.
DMARC records are text (TXT) resource records (RR) that are published in the DNS and tell an email receiver what to do with non-aligned emails it receives.
Consider an example DMARC record for the domain “sender.exampledomain.com” that reads: v=DMARC1;p=reject;pct=100;rua=mailto:postmaster@exampledomain.com
Log in to the DMARC dashboard to create a DMARC record for your secured company domain. Then navigate to DNS Records -> Publish DMARC Record and copy the excerpt displayed in orange on the page.
For the test domain DMARC site, here’s a sample DMARC entry:
v=DMARC1; p=quarantine; rua=mailto:reports@dmarc.site; ruf=mailto:reports@dmarc.site; adkim=r; aspf=r; rf=afrf
- For email whose breaches policies should be handled, the “p” option provides three options: none, quarantine, or reject.
- The adkim and aspf parameters specify how stringent the DKIM and SPF policies should be implemented, with ‘s’ denoting strict and ‘r’ denoting relaxed.
- The RUA provides an address for aggregate data reports, while the RUF provides an address for forensic reports
Step 2. Publish the DMARC record to DNS
Now that you have the DMARC record, publish it to the DNS so that email service providers can use it to run DMARC checks.
To do so, go to your DNS management interface and choose the domain for which you want to publish the DMARC record, such as mydomain.com.
Create a TXT entry with the following settings on mydomain.com:
Type: TXT
Host: _dmarc
TXT Value: (DMARC record generated above)
TTL: 1 hour
For instance, here is how it appears in GoDaddy’s DNS administration console:
It can take up to an hour for the DMARC record to become accessible after it has been published (usually much faster). You can then use the DMARC Checker tool to double-check if it was correctly published.
Step 3. Analyze aggregate reports
Every day, many email service providers send out aggregate reports. This means you might get aggregate reports the day the DMARC record is published.
However, your first aggregate reports could take up to 72 hours to come. Once you get the information, you must utilize it to correct your email streams.
Conclusion
Large enterprises have been able to reduce phishing-based brand impersonations to near nil utilizing automated DMARC implementation tools like ProDMARC.
This not only protects the brand’s reputation and the effectiveness of revenue-generating email campaigns, but it also protects employees, customers, partners, and the general public from expensive email frauds. Get in touch with us to discover our email authentication solutions.
2 Comments